With the increasing usage of WordPress as a content management system (CMS) for powering full websites, we are often asked what is the easiest way to add Bullseye as a WordPress store locator. So we decided to put together these instructions to make it easy for anyone running WordPress.
All you need is a Bullseye account, an embeddable locator interface (which you can create through Bullseye’s interface building tool) and, of course, you need WordPress. We recommend 3.2 or higher.
Step One-Create your Bullseye Embeddable Locator
Start by creating a new embeddable interface in the Bullseye admin. Go to “Interfaces” in the left hand nav. then select “Add an Embeddable Interface.” Save your work, then select the “Publish” tab. Here you’ll find the embed codes that you need for your WordPress site. You’ll want the code listed under “iFrame Embed for Website.” It will look something like below:
<iframe src=’https://www.bullseyelocations.com/pages/<<PageName>>?f=1′
width=’900′ height=’980′ frameborder=’0′ scrolling=’auto’/>
Grab a copy of that line and set it aside.
Step Two-Add WordPress Plugin to Support iFrame
Your out-of-the-box WordPress installation doesn’t support iFrames for security reasons. So before you can add the iFrame code for your store locator, you’ll need a plugin that provides support for iFrames. If you search under plugins, you’ll find there are a variety of them. The one we recommend is available at https://wordpress.org/plugins/iframe/. This plugin allows you to modify the code above slightly so that it runs on your WordPress site. Go ahead and install then activate this plugin.
Step Three-Add and Modify iFrame Code
Once the plugin is installed, navigate to the page or add a page where you’d like to add the store locator. In the edit page window, add your iFrame code from Bullseye. Then you’ll need to just replace the “<” and “>” signs with “[“ and “]”. Your final code will look like the following:
[iframe src=’https://www.bullseyelocations.com/pages/<<PageName>>?f=1′ width=”960″ height=”980″ scrolling=’auto’]
(Be sure to paste this code into the text view to avoid any extra formatting such as the bold tag used in this post.)
Depending on your theme, you may also want to change the page attribute setting on the right hand side of the Edit Page in WordPress to use the “Full-Width Page Template, No Sidebar” option.
Step 4-Modify Your Locator to Fit the Style of the Page
You can also easily modify the interface settings through the Bullseye admin to change colors, modify locator width and height, add radius options, and include a custom map icon. Make these changes in the Bullseye interface builder. After saving the changes they will automatically apply to your WordPress store locator.
If you are using the “Full-Width Page Template, No Sidebar.” option as recommended above, we suggest a width of 960.
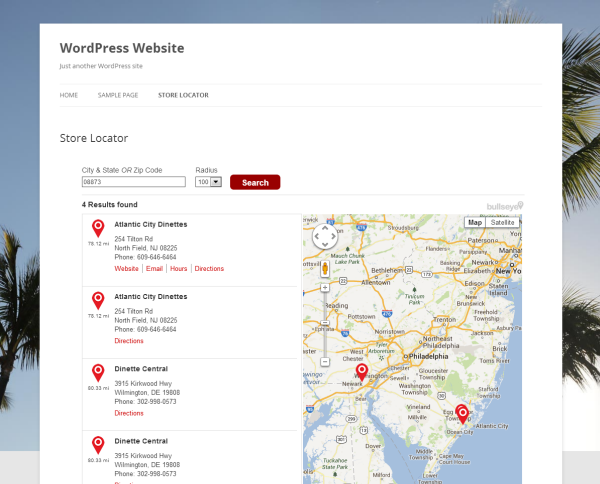
Step 5-Enjoy Your New WordPress Store Locator
Now visitors will be able to search for locations on your WordPress site. If you are using Bullseye for Facebook, other websites, mobile apps, or anywhere else, locations are managed in one place in the Bullseye Management Interface and can be integrated with other 3rd party systems through our API tools. This saves time and helps to maintain the quality of the locations across all channels.